House Cake Project: Stage 6 – Birthday Cake For Joe

For this installment of my House Cake Project, I decided to take a break from the rolled fondant. I have found a brand that I really like, however I wanted to try something new. {Well, “new” for me is “not working with fondant”…}

There aren’t any special recipes for this cake, instead I’ve put together a layer cake. I asked Joe what his favourite types of cake are. His reply was “rainbow bit, and cheese cake!”, so I had to find a way to blend the two… And wow, was this ever a tasty combination…

I decided on making 2 “rainbow bit cakes” {box mix}. Then, in between the top and bottom layers of rainbow bit cake, I placed some frosting, sliced strawberries, and a cheese cake. The cheesecake was a basic cheese cake recipe {vanilla/plain} with strawberry preserves swirled throughout the top of the cheese cake prior to baking.

The layers, from bottom to top, are:

  1. rainbow bit sponge
  2. vanilla cream cheese frosting
  3. sliced strawberries
  4. cheesecake {no crust} with strawberry preserve swirl
  5. vanilla cream cheese frosting
  6. sliced strawberries
  7. rainbow bit sponge
  8. strawberry preserve glaze on top of cake {For the glaze, simply ice the sides of the cake, and leave the top un-iced. Then, microwave the strawberry preserve/jam in a bowl for about 45 seconds, stirring every 15 seconds. Allow to cool slightly, then spread over the top of the iced cake.}

The cake was then iced with the same vanilla frosting. I toasted some sliced almonds with a sprinkle of cinnamon for about 5 minutes in the oven, and tossed them along the side of the cake. I also prepared some double chocolate dipped strawberries for garnish {dipped the strawberries in melted milk chocolate, then drizzled some melted white chocolate over the berries once the milk chocolate was set}, and made a chocolate plaque for the top of the cake. {The plaque was just some melted chocolate, poured and shaped with a spatula onto some parchment paper, then writing was piped on with a piping gel and allowed to set in the fridge before application to the cake.}

Everyone seemed to really enjoy this, as there was no cake left over afterwards! The cake turned out significantly larger than I had hoped, but that’s okay… 😉

Here’s the visuals!

Finished product!!

Finished product!!

Just because it’s pretty, here’s a picture of a double chocolate dipped strawberry! 🙂

Salt Water Toffee (Vanilla Orange Cream)

One of my favourite candies is salt water toffee. The flavours that some companies come up with are pretty crazy, but my favourites are orange and vanilla. So smooth and chewy, and they really satisfy a sweet tooth. These candies remind me of my childhood, and oddly enough, many trips to Canada’s Wonderland. At Christmas time last year, I received a Canadian Living Holiday magazine, and so many of the recipes just jumped right out at me! {The recipe I posted for sponge toffee is actually from that magazine too!} The one item that made me stall on doing this recipe for so long was the edible glycerine. I was a bit iffy when finding this stuff, but did a bit of research and learned that there is an edible type {that can be found in baking sections of some stores}, and a NON edible type that is found at the drug store. So now, I will share the simple recipe for salt water toffee! This is definitely something that I will be making again, and again… And again… Mmmmmmm… Enjoy! 🙂 

This recipe is from the Canadian Living Holiday Cookbook: Fall 2009, and you can view it on their website by clicking here

This recipe makes about 30-35 pieces. (The original recipe makes about 76 pieces, but I cut in half… That’s a LOT of toffee…) 

Salt Water Toffee (Vanilla Orange Cream) 

Ingredients

  • 162.5 mL granulated sugar
  • 75 mL white corn syrup
  • 62.5 mL water
  • 1 tbsp cornstarch
  • 1 tsp EDIBLE glycerin {do NOT purchase this from a drug store, as it is not the edible grade of glycerin. You need to go to a store that has baking/cooking items. Michael’s may carry this, and Bulk Barn does carry this. You will find it in the section with all of the flavour extracts/food colouring.}
  • 3/4 tsp salt {sea salt is called for in the original recipe, however I used regular salt and ended up with amazing results}
  • 1 tbsp unsalted butter
  • 1/8 tsp (“dash”) of “essential oil flavouring” {I used about 1 mL of vanilla extract, and 1 mL of orange essential oil flavouring, and my toffee came out with such a great flavour!}
  • Paste food colouring {I used peach colour, just a bit on the end of a stir stick, and it gave me a nice creamy colour}
  • Icing sugar for rolling/stretching

Method

  • Lightly grease a rimmed non-stick baking sheet. {Pam, or any other cooking spray, works well. You can use butter if you don’t have spray.}
  • In a deep pot/saucepan over medium heat, combine the sugar, corn syrup, water, cornstarch, glycerin and salt. Stir until you’ve brought everything to a boil.
  • Attach a candy thermometer to your pot.
  • Continue to cook without stirring until the temperature reaches 260 F (126 C) “hard ball stage”. {You can also test this without a candy thermometer by dropping some of the syrup in cold water, and it will form a “hard ball”. This will take about 8 minutes for the mixture to reach this stage. I do strongly suggest, however, that you purchase a candy thermometer to get the best results. It’s $5 WELL spent!}
  • Remove the pan from heat IMMEDIATELY when it reaches the desired temperature, and stir in your flavour and colour until combined.
  • Pour the mixture into the prepared baking sheet, but don’t scrape the mixture off of the bottom of the pan.
  • Allow to cool on the baking sheet for about 5 minutes. It is ready to “pull” once you can press your finger into the mixture and it leaves an impression.
  • Use your spatula/spoon to fold the edges of the mixture over the middle, and continue to do this until it is cool enough to use your hands. For me, this only took another 2 minutes.
  • Lightly grease your hands with butter, and grab all of the toffee. Pull it, twist it, and mush it together! It may stick to your fingers, so just add a little more butter onto your hands if this happens.
  • Keep pulling the toffee until it’s no longer glossy. It will also get much harder to pull and twist, and will become less sticky. This pulling and twisting process takes about 10-15 minutes.
  • Dust the counter/cutting board with icing sugar, and pull your toffee into a long rope, no thicker than 2 cm. Grease your scissors (or knife) and cut the rope into the desired sized pieces.
  • Cut some waxed paper into rectangles, and wrap each piece of toffee with the ends of the paper twisted.
  • These can be stored for about 2 weeks at room temperature, in an open container or box.
Pulling the toffee!

Pulling the toffee!


Look at that colour! :)

Look at that colour! 🙂


Rolled out and ready to cut

Rolled out and ready to cut


Toffee is cut and ready to package

Toffee is cut and ready to package


wrapped in wax paper

wrapped in wax paper


Pretty toffee! <3

Pretty toffee! ❤

House Cake Project: Stage 5 – Designing & Decorating Girly Cupcakes With Rolled Fondant

I was so happy when the baby shower cake I made in Stage 4 came together so well without falling apart! And then I was shocked and flattered when the mother-in-law of the mom-to-be told me that she had given some of the cake to co-workers, and one of her co-workers wanted to know if I could make some cupcakes for her daughter’s birthday. I had a lot of fun working on this one, because I really love making girly baked goods. I LOVE how pink frosting and fondant look, and all of the different types of shimmery things you can decorate with… I’m sure I could do a masculine cake or something, but I LOVE doing things like this one because it reminds me of birthday parties from my childhood.

So for this project, I tried to get a lot of planning done in a short time. I had come up with a few ideas: either baking the cupcakes IN cones, or decorating the cupcakes with a mini-ice cream cone (filled with marshmallow). After going out and finding all of the supplies I needed, I discovered a little too late that the ice cream cones on top of the cupcake just wouldn’t work. (Size had a large part in this…)

So I came up with another idea to stick the ice cream cone right in the top of the cupcake. I wanted to make the cupcakes as girly as possible, and unfortunately adding the ice cream cone to the cupcake didn’t give that “feel” that I wanted. So on to another idea…

My main idea for these cupcakes that stayed constant through-out the planning process was making one batch chocolate, one batch vanilla… Then cutting off and switching the tops of each flavour to make a two-layer cupcake. I also made a strawberry butter cream icing to fill the cupcakes with. 🙂

Instead of continuing to talk about it, I’ll just post photos with explanations for the remainder of this entry. 🙂


two tester cupcakes: switched the tops.

two tester cupcakes: switched the tops.


another of the switched tops :)

another of the switched tops 🙂

home made strawberry butter cream to fill the cupcakes :)

home-made strawberry butter cream to fill the cupcakes 🙂

using a cup to make the covers for the cupcakes out of rolled fondant. (this tea cup gave the PERFECT size for cupcakes!!!)

using a cup to make the covers for the cupcakes out of rolled fondant. (this tea-cup gave the PERFECT size for cupcakes!!!)

"dirty iced" cupcakes with fondant circles. (of course, I had to spread the icing before applying the circles... but I like to swirl it on first... :) )

"dirty iced" cupcakes with fondant circles. (of course, I had to spread the icing before applying the circles... but I like to swirl it on first... 🙂 )

icing is spread smoothly to cover any cracks in the tops of the cupcakes... now to apply the fondant circles!

icing is spread smoothly to cover any cracks in the tops of the cupcakes... now to apply the fondant circles!

pink covered cupcakes (vanilla bottoms with chocolate tops)

pink covered cupcakes (vanilla bottoms with chocolate tops)

white covered cupcakes (chocolate bottoms with vanilla tops)

white covered cupcakes (chocolate bottoms with vanilla tops)

cutting out hearts from pink fondant

cutting out hearts from pink fondant

"glued" the hearts on by using some melted fondant (small amount!) with hot water. mix it together, and paint a tiny bit on the back of each fondant decoration to make it stick to another piece of fondant.

"glued" the hearts on by using some melted fondant (small amount!) with hot water. mix it together, and paint a tiny bit on the back of each fondant decoration to make it stick to another piece of fondant.

reverse colour

reverse colour

one idea: poke an ice cream cone through the top, and pipe some butter cream icing on top to make it look like soft serve. this idea did NOT work how I thought it would...

one idea: poke an ice cream cone through the top, and pipe some butter cream icing on top to make it look like soft serve. this idea did NOT work how I thought it would...

So I decided to keep it simple and girly by dropping the ice cream cone.

So I decided to keep it simple and girly by dropping the ice cream cone.

with some pink decorator gel, I piped on the letter "A" to each cupcake (the birthday girl's first initial), and then dipped the top of the cupcake in pink sugar so that it would stick to the piped gel. I also dusted each cupcake top with a silver shimmer powder.

with some pink decorator gel, I piped on the letter "A" to each cupcake (the birthday girl's first initial), and then dipped the top of the cupcake in pink sugar so that it would stick to the piped gel. I also dusted each cupcake top with a silver shimmer powder.

I even found a way to keep the ice cream cones involved! :)

I even found a way to keep the ice cream cones involved! 🙂

SUPPLIES USED:

  • rolled fondant
  • gel food colouring (pink) to make pink fondant
  • icing sugar to dust work surface of rolled fondant
  • rolled fondant rolling-pin
  • LOTS of paper towels for constant cleaning 😉
  • vanilla butter cream icing for “dirty icing” of tops of cupcakes for application of rolled fondant
  • home-made strawberry butter cream for centers of cupcakes, and to hold the switched tops to the base
  • silver candy balls for decoration around the heart
  • decorator white and pink candy gel to “glue” silver balls onto fondant
  • decorator pink candy gel to pipe letter “A” on cupcakes
  • water and brush to “glue” fondant hearts onto cupcakes
  • pink sugar for decoration on piped letter “A” on cupcakes
  • marshmallow filled mini ice cream cones for presentation on delivery
  • chocolate and vanilla cake mix
  • muffin tins/paper cups/ice cream pattern paper cups for display

Sponge Toffee

Here is *sigh* entry 4 of 4 from my “Easter Weekend” baking blitz. Sponge Toffee, adapted from the Canadian Living Holiday Cookbook Limited Edition. (This magazine/cookbook has some real goodies inside! 😉 ) The only thing I did different for this recipe, was substitute the white corn syrup for organic liquid honey. In almost any recipe, you can make that type of substitute. (Visit the Joy of Baking’s website for a full list of ingredient substitutions. There you will find one of THE most accurate and extensive substitution lists, you’ll never need to look anywhere again! A life saver: I’ve visited this website on many occasions when I’m lost half way through a recipe.)

As I’m sitting here, 1 1/2 weeks after making this batch, I am eating a piece of this stuff. It keeps VERY well in an air tight container for up to 1 month (maybe longer). And having caught Joe sneaking into the container when he though I wasn’t looking, I can confidently say that these taste pretty awesome! 😉 So, I’ll stop yammering on and give you the recipe already! Enjoy! 😉

Note: I am providing the full recipe. I made half of the recipe, and that makes a LOT of sponge toffee…

Sponge Toffee

Ingredients:

  • 2 1/2 cups granulated white sugar
  • 2/3 cup liquid honey (the magazine says to use white corn syrup. no thanks!)
  • 1/3 cup water
  • 4 tsp baking soda
  • 2 tsp vanilla extract
  • Note: You will need a candy thermometer for this recipe. Please, go out to Kitchen Stuff Plus (or whatever you have near you), and spring for a $5-$8 clip-on “candy and deep fry” thermometer before attempting any recipes that require you to make something to “hard crack”, or ANY crack stage for that matter… It will save you SO MUCH frustration. If you follow the whole “soft ball” technique of dropping a bit in a glass of cold water, your mixture may have already surpassed the stage you’re trying to attain once you’ve finished your “water test”. I offer this tip out of much experience in trial & error… More error than success… 😉

Method:

  • In a large pot, mix sugar, honey and water. Dissolve the sugar over medium heat.
  • Clip the candy thermometer to the side of the pot (with the thermometer on the inside of the pot 😉 ) ensuring the tip is submerged but no touching the bottom of the pot.
  • Bring the mixture to a boil over medium heat, without stirring. Occasionally, use a pastry brush to apply a light amount of water around the inside of the pot so that none of the sugar crystallizes while boiling.
  • Allow to boil without stirring, until the mixture reaches 300 F on the thermometer. (This is “hard crack” stage, and will take about 10 minutes, so be patient!)
  • Remove from heat the SECOND you see 300 F. With your face far enough from the pot, quickly whisk in the baking soda. (Note: it will bubble and splatter a bit, and will puff up, so make sure any pets or kids are out of the way!)
  • Quickly whisk in the vanilla.
  • Pour into a greased metal cake pan (13- x 9- inch), and allow to cool without touching for about 2 hours. (The magazine suggests to: grease the cake pan, line it with foil, then grease the foil. You can do this if you like, but some of the foil still may sick to the toffee.)
  • Once set, break into many pieces, and eat eat eat! 🙂 And um… Share some… 😉
  • Optional: If you like Crunchie Bars, you can make them now! Simply melt some of your favourite chocolate, and then dip the finished toffee in the melted chocolate. Allow to set on a parchment paper lined baking sheet, then devour!
300: I AM SPARTA!!! wait. no. ADD BAKING SODA!!!!

300: I AM SPARTA!!! wait. no. ADD BAKING SODA!!!!

whisk it fast!

whisk it fast!

vanilla is being whisked in now... not quite ready to pour into the pan!

vanilla is being whisked in now... not quite ready to pour into the pan!

you're good to go, POUR POUR POUR!!!!

you're good to go, POUR POUR POUR!!!!

in the pan, don't touch for 2 hours!

in the pan, don't touch for 2 hours!

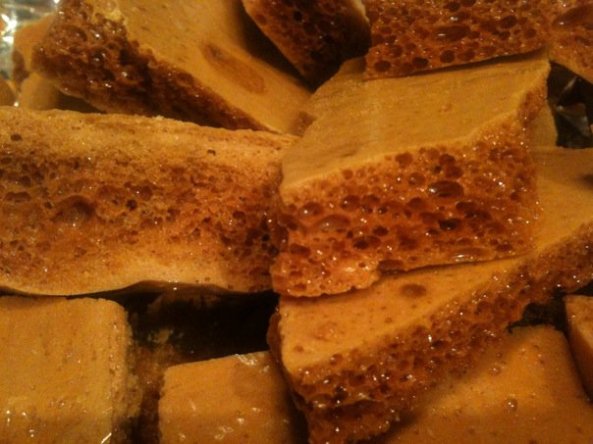
oh yeah, that's the stuff... ;) finished product!!

oh yeah, that's the stuff... 😉 finished product!!

Meringue Puffs (Vanilla and Chocolate Mint)

Here is entry 3 of 4, although it deserves to be #1 in my eyes! When I posted the pictures for these a week ago on Facebook (ya ya…) one of my old childhood friends mentioned that her mom used to buy these from a bakery and bring them home, and she loved them. This reminded me of how my mum used to actually do the same thing, and it brought back so many nice memories. 🙂 A more recent memory of these light puff cookies, is going to the Patty King in Kensington Market (located in Toronto). Among the many tasty foods there (oh the Jamaican Doubles, *drool*), the meringue puffs never cease to amaze my taste buds! Now, I don’t have an electric mixer at home (not sure why, you’d think I’d have something like that!), so I used a balloon whisk. I will say, that although you get amazing results by doing this by hand, it will take TWICE the amount of whisking time (and a tired arm) to get the same results that you would get with a hand-held electric mixer. So prepare yourself! Stretch out your wrist, do some push-ups, whatever you need to do to get your arm good and ready! Or, just use an electric mixer. Either way. 😉

Here is my recipe for some amazing meringue puffs! I’ve used two flavours, plain/vanilla AND chocolate mint. You can also add any other flavoured extracts, but go easy on the liquids otherwise they won’t rise properly when baking. Note: These puffs also taste great when made simple with egg whites, sugar and cream of tartar. Flavour isn’t necessary, as they’re so light and sweet. BUT, adding flavour to them is fun! For something different, add in some crushed chocolate chips… Enjoy! 🙂

This recipe makes anywhere from 6 to 15 puffs, depending on the size!

Meringue Puffs (Vanilla and Chocolate Mint)

Ingredients:

  • 2 egg whites at room temperature
  • dash cream of tartar (1 ml) (GREAT as a stabilizer for egg whites, without any undesirable flavour. This stuff is a must-have item in the kitchen for any baker!)
  • 1/2 cup superfine sugar (if you don’t have superfine, you can use regular white granulated sugar, but it will take longer for the sugar to dissolve in the meringue. I suggest using a clean coffee grinder to “grind” the granulated sugar in order to make it finer.) Alternatively, you can use Splenda to taste if you can’t use sugar.
  • optional: dash of vanilla extract OR dash of vanilla sugar
  • for chocolate mint meringues: whole batch, add about 1 tbsp cocoa powder and dash of peppermint extract. Half batch, add about 1/2 tbsp cocoa powder and 2-3 drops of peppermint extract.

Method:

  • Line a baking sheet with parchment paper. Set aside.
  • Separate the egg yolk from the white while it is still cold, as it will be easier.
  • Before you begin, ensure the egg whites have been brought to room temperature at least 15 minutes prior to starting.
  • Pre heat your oven to 250 F. You need your oven to reach this higher temperature prior to cooking the meringues so that the outside of each meringue can attain that desirable texture that makes them so tasty. The oven temperature should not be lowered until the moment before you put them in to bake.
  • In a clean glass bowl (you can use stainless steel or copper also, however it is advisable to not use plastic as plastic bowls hold on to any grease or moisture that they have come in contact with. Moisture and grease are the two enemies of meringue puffs!), mix together the cream of tartar with the egg whites.
  • Start off whisking slowly, then gradually increase speed. If you are using a balloon whisk, it will take you about 10-15 minutes to get soft peaks. (This is when you lift the whisk out of the mixture, and the meringue peaks up slightly, but falls back down.)
  • Tip: hold the balloon whisk as if it were a pencil, and whisk from the wrist. This will make it much easier on your arm. Also, whisk in an upward motion starting from the side of the bowl furthest away from you, and working towards yourself. If using an electric mixer, beat the whites at a low-speed, then increase to a medium speed until soft peaks form.
  • When you are getting soft peaks, gradually add the sugar under each whisking motion (add the sugar under the meringue, and whisk upwards towards you). Doing this will prevent the meringue from flattening out. You do not need to whisk any slower while adding the sugar.
  • After you have added all of the sugar, whisk a little bit longer until stiff peaks form.
  • Add the flavoured extract you are using (vanilla or mint, depending on which batch you are using), and if you are doing chocolate meringues, this is also when you add the cocoa powder. (If making two batches at once with different flavours, transfer half of the batch to a new bowl to add in the second flavour.) Whisk lightly to mix the flavours in, but be careful not to over mix once you are getting stiff peaks as this will cause the meringues to not rise properly. You must whisk until all of the sugar is dissolved. To check the sugar, simply pinch some meringue between your thumb and index finger to ensure you cannot feel any granules of sugar.
  • For a “blob” shape of meringue, you can use a spoon to scoop out meringue onto the lined baking sheet. For my “blob” batch, I used about 2 tbsp of meringue per puff. Space each meringue about 1/4 inch apart.
  • For a pretty shape of meringue, you can use a pastry bag with a coupler and a tip (or a plastic sandwich bag with a hole cut in it if you don’t have a cake decorating set 😉 ), and fill the bag with meringue to pipe it onto the lined cookie sheet. (Open the bag over one hand, fold the edges of the top of the bag over your hand, use your free hand to scoop the meringue inside, twist the top of the bag closed, and you’re good to go!) For my piped batch, I made little spiral puffs, and little stick shaped puffs.
  • Now, turn down the heat of the oven to 195 F. (The higher heat prior to insertion is required so that the oven retains enough heat to give that light “crispyness” to the outside of the meringues.)
  • Place the lined cookie sheet in the middle rack of the oven, and bake for 1 1/2 hours. Check the meringues at 1 hour to make sure they are not burnt. They are done when you tap the bottom/side of the meringue, and it sounds hollow and has set. If any meringue comes off onto your finger, they are not done. For larger meringues, I’ve had to leave them in for the full 1 1/2 hours, and the result was a crispy and light meringue puff with a slightly soft center (mmmmm!). For smaller meringues, 1 1/2 hours will give you a light and crispy puff all the way through. If you want the insides of the small meringues to be somewhat gooey, while the outside is crispy, simply keep the baking time to 1 hour for a small meringue.
  • After the time is up, DO NOT remove the meringues from the oven. Turn off the oven, and keep the meringues inside for 3-4 hours (3 hours for a softer center, 4 hours for a firm center). This will allow the meringues to set properly without being over baked.
  • After the 4 hours is up, remove the meringues from the oven, and allow to cool at room temperature before eating. (I couldn’t wait, so I ate some of them fresh out of the oven… They were a bit soft when doing this, but oh-so-good!!!)
  • These can be stored at room temperature for a few days to a week. They’ll be eaten before that though… 😉
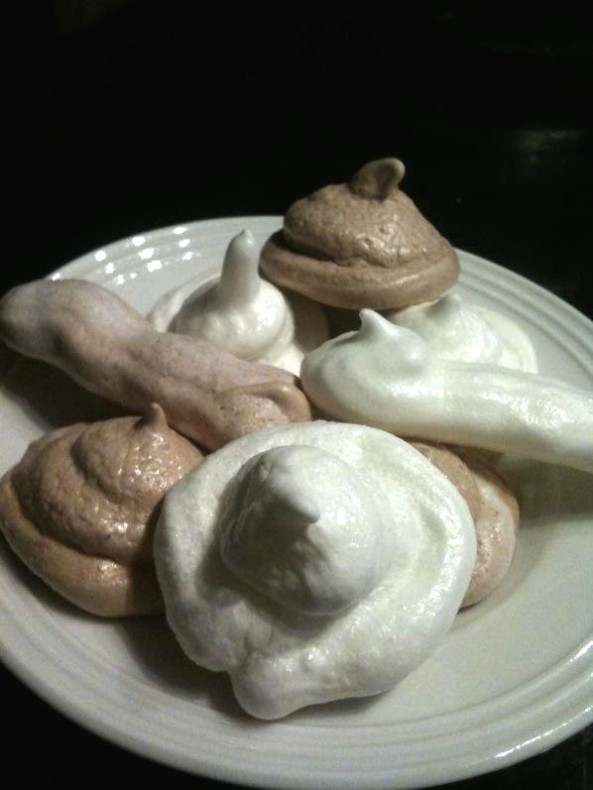
my "blob shaped" meringue puffs, chocolate and vanilla :)

my "blob shaped" meringue puffs, chocolate and vanilla 🙂

piped swirls and sticks of vanilla and chocolate mint meringue puffs!

piped swirls and sticks of vanilla and chocolate mint meringue puffs!

Peanut Butter and Chocolate Chip Tarts

Here is entry 2 of 4 from my “Easter Weekend” baking blitz. After making the 3 layer lemon cheesecake cups, I had 4 cups left over of graham cracker crust prepared. I didn’t want to throw them out, because they taste so good… So I grabbed a few things and got to work on something filled with peanut buttery goodness because I know Joe LOVES peanut butter! 😉 Here’s a yummy little treat! Enjoy! 🙂

Peanut Butter and Chocolate Chip Tarts

Ingredients:

  • 4 left over graham cracker crust filled muffin cups
  • 3 tbsp natural peanut butter
  • 1 tbsp brown sugar
  • 1 tbsp icing sugar

Method:

  • Pre heat oven to 325 F.
  • In a bowl, mix the peanut butter and sugars.
  • Divide the mixture between the four muffin cups.
  • Add some chocolate chips on top (as many as you like! I put 8 on each cup…)
  • Bake for about 40 minutes, until peanut butter mixture is set. (The baking time is the same for the 3 layer lemon cheesecake cups, so you can actually bake these all at the same time if you like!)
  • Remove from oven, and allow to cool for about 15 minutes.
  • Eat warm, or chill in the fridge ( on a paper towel lined plate and covered in plastic wrap) until cold.
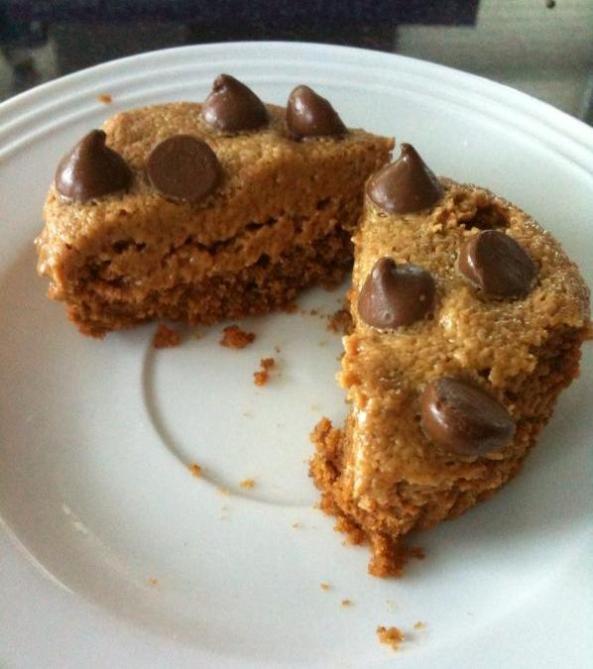
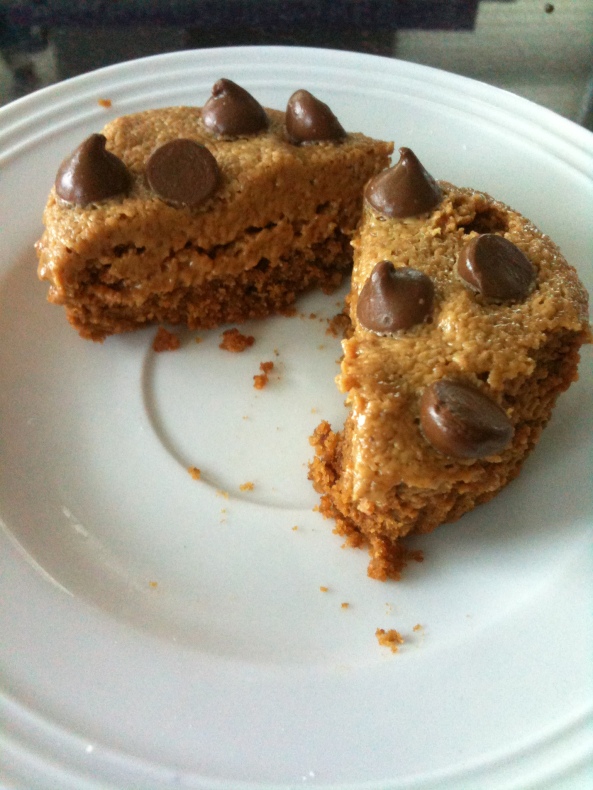
Mmmmmm... Peanut Butter Chocolate Chip Tart....

Mmmmmm... Peanut Butter Chocolate Chip Tart....

Coming Soon!!

It’s been a few days since my last post, but that doesn’t mean I have been staying out of the kitchen! I don’t have the recipes with me to post at the moment (time is also restricted due to money-making), but here’s a preview of some sweet treats that I will be posting later this evening when I have a chance! 🙂 Check back later this evening/tomorrow for the recipes! 

Chocolate Chip Tart with a Vanilla Graham Cracker Crust

Peanut Butter Chocolate Chip Tart with a Vanilla Graham Cracker Crust

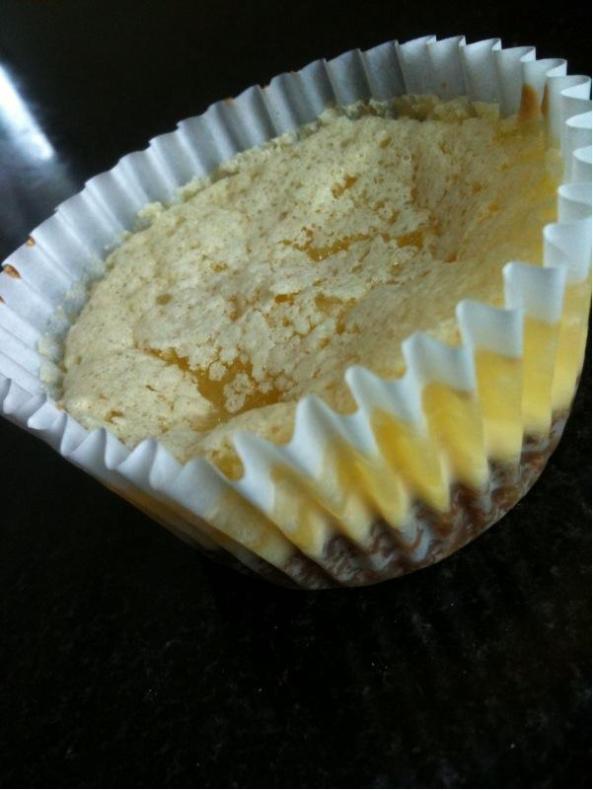
3 Layer Lemon Vanilla Cheesecake Cups

3 Layer Lemon Vanilla Cheesecake Cups

Vanilla and Chocolate-Mint Meringue Puffs

Vanilla and Chocolate-Mint Meringue Puffs

Sponge Toffee (Just like in the Crunchie Bar! ;) )

Sponge Toffee (Just like in the Crunchie Bar! 😉 )

House Cake Project: Stage 4 – Designing & Decorating A Baby Shower Cake With Rolled Fondant

This is a bit of a long one, as it’s my most detailed creation yet! If you just want to see the picture of the finished cake, scroll down to the bottom of the entry! 🙂
One of my best friends is having a baby in April, and I wanted to do something special for her. With this whole cake thing going better than I thought, I figured I’d try to design and create a cake for her baby shower. The way I see it, people have a fancy cake for weddings, so there’s no reason to not have a fancy cake for a baby shower! 🙂 I spent about 2 weeks thinking of different design possibilities, and finally settled on doing a flat rectangular base with letter blocks on the top spelling “baby”. I was originally going to put the baby’s name (Aaliyah) on smaller blocks, but decided to use a fondant plaque instead. I’ve pieced together some of the process pictures below, with a brief description under each cluster of pictures, followed by the finished product. 🙂 It didn’t turn out quite how I had envisioned it, but for my third actual cake that I’ve decorated, I’m pretty confident that it turned out well! 🙂 The butter cream that I used was the same as in the strawberry icing recipe I posted in an earlier post, however I used less icing sugar than the recipe called for.
For sticking royal icing, chocolate, fondant and silver candy ball decorations, I used a basic icing that was made for use on sugar cookies. You know, that icing that dries hard so that you can stack the cookies… It works WONDERS for use as a “glue” when decorating a cake… It comes in little tubes, but you have to make sure it says “great for stacking cookies”.

Note: I’ve been asked on a few occasions how to work with rolled fondant. I’m not trained in cake decorating, and I’m just doing this for fun. (For now anyways! ;)) So I probably can’t give the best pointers, however one website that I’ve found that gives GREAT information and a step-by-step guide to using fondant (along with many other tips) is the Wilton’s Website.

pre-cake: icing letters & decor, chocolates, and a chocolate fondant bear

pre-cake: icing letters & decor, chocolates, and a chocolate fondant bear

Above, starting from top left to right:

  • White royal icing letters. “BABY” could not be used, as the A and the Y both broke, so I piped icing onto the blocks instead. I had to pipe a lot of extra letters with Aaliyah’s name just in case any broke…
  • Pink royal icing hearts for the ribbon on the cake. Pink feet shown here, but not used on the cake.
  • Multi-coloured chocolates made in a chocolate mold. Used a paintbrush to get layers of colour.
  • Second row: teddy bear, different angles.
  • Third row: Finished chocolate fondant teddy bear! 🙂 He’s cute. I put cocoa powder in with the fondant while I worked it like bread dough.
ah, the messy stuff!

ah, the messy stuff!

Above, starting from top left to right:

  • Amazing strawberry icing. This stuff is great, right out of the bowl… I will never buy strawberry icing, because home-made is so much better! Unfortunately, it either wasn’t thick enough on the cake OR it soaked in to the cake while it was being decorated… Ah well!
  • The multi-coloured cake chilling in the fridge. (Vanilla, Strawberry (icing) and Chocolate. Keeping with the “brown, pink and white” colour theme.)
  • Second row: “dirty iced” is the term used to describe the layer of icing that you put on the cake prior to applying rolled fondant. You need either a glaze, or a layer of butter cream, in order to ensure that the fondant sticks to the cake. It’s okay for it to be a bit messy, but it’s best to try to make it as smooth as possible… Then I covered the iced cake, smoothed the fondant over it with my hands, and trimmed off the extra little pieces of fondant hanging over the edge.
  • Third row: I coloured some fondant pink with gel food colouring, rolled out the fondant with a rolling-pin, and cut measured and even strips for the ribbon. (Not pictured: I cut a longer piece also to create a “bow” for the front of the cake.) Then I made another cake so that I could cut out some squares and trim them to make some “blocks” to place on top of the cake. Next time, I’ll probably just use rice crispie treats for these types of things… Cake blocks don’t set up all that well… More like floppy blocks. I’ve also pictured the blocks being covered with the pink fondant, then the edges being trimmed. They are now ready to be decorated! 🙂
almost there!

almost there!

Above, starting from top left to right:

  • Decorated “baby” blocks, letters and border piped on with a firm decorator icing, and a #27 tip. Chocolates applied to the tops with the cookie decorating icing.
  • Ribbon and bow is applied to the cake with the cookie decorating icing, and the bow is also attached with the same icing. A pink decorating icing is used to paint a trim on the bow. 🙂
  • Second row: royal icing hearts, and tiny silver candy balls are attached to the bow for decoration. (The hearts also help to cover up the seams from the bow…heehee…) Then, I applied a thin coating over all of the pink elements with a silver shimmer powder with a small paintbrush. It’s pretty much just an edible powder that you “dust” a tint on with. You can purchase these powders at any place where you buy other cake decorating supplies, such as Michael’s or the Bulk Barn.
  • Third row: just a close up of the ribbon with decor.
teddy bear, hanging out on the cake.

teddy bear, hanging out on the cake.

Above:

  • Here’s the chocolate fondant teddy bear, and I’ve placed a royal icing heart in his lap. 🙂 Brushed with a light coating of the shimmer powder. As with the other decor, all elements of the teddy bear are glued together with cookie decorating icing.
finished cake!

finished cake!

Above:

  • The finished cake! 🙂 The picture quality isn’t amazing or anything, as it’s just taken on my iPhone, but I’ll be uploading some better quality images onto my Flickr soon!

Strawberry Filling for Strawberry Cream Chocolates

With my love of chocolate, and wanting something berry flavoured (and not artificial!), I decided to make a strawberry filling for some chocolates I was planning on making for an event this upcoming weekend. This combination turned out WAY better than I thought it would, and I’m so thankful that it worked on the first try, because this is now my go-to strawberry filling recipe! For the chocolates, follow the chocolate mold instructions from my older post.

Strawberry Filling for Strawberry Cream Chocolates

Enough for 24 candies.

Ingredients:

  • 4 frozen strawberries
  • 1/5 cup marshmallows
  • 1/4 cup white chocolate molding wafers
  • 3/4 cup icing sugar (add more if cream is too thin after refrigeration)

Method:

  • Place strawberries in a microwave safe bowl,and microwave until strawberries are soft.
  • Immediately add the marshmallows and white chocolate molding wafers, and microwave for about 30 seconds more until the strawberries are soft enough to mash, and the chocolate and marshmallows are starting to melt.
  • Remove from the microwave, and stir the mixture until it is evenly blended. If you need to melt the marshmallows, microwave again at 10 second intervals (stirring between each interval) until all is melted.
  • Add in the icing sugar, 1/4 cup at a time, and stir until combined.
  • Allow to cool in the fridge for 20-30 minutes before using with the chocolate mold.
cooling in the fridge

cooling in the fridge

Strawberry Cream Filled Chocolates (pink & white are both white chocolate, and brown is milk chocolate)

Strawberry Cream Filled Chocolates (pink & white are both white chocolate, and brown is milk chocolate)

Peanut Butter Filled Chocolates

Chocolate cravings are a frequent thing with me, so I always make sure to keep items on hand that will allow me to quickly whip up something tasty. One of my husband’s favourite combinations for sweets is peanut butter and chocolate, and I have to say that it is also one of mine. In keeping with the method of making filled chocolates at home that I posted in my buttercream filled chocolates recipe, I decided to make some peanut butter filled chocolates so that both Joe and myself could indulge. It’s so simple to get that sweet peanutbuttery flavour, so I’ll share the recipe I use to make these yummy little things! This recipe makes enough filling for about 12-16 small to medium-sized chocolates.

Note: To avoid repeating the instructions on how to prepare a chocolate mold (they’re a bit long), please view the instructions in my recipe for Buttercream Filled Chocolates. I’ve also used this filling recipe for Peanut Butter Cup Tarts, which is a tasty variation on a peanut butter cup crossed with a tart or a pie.

Peanut Butter Filled Chocolates

Ingredients:

  • 1 cup Belgian milk chocolate molding wafers, divided into 2 bowls: 3/4 cup in one bowl and 1/4 cup in another bowl (You can use dark chocolate if you like, but milk tastes best in this recipe!)
  • Molding tray
  • 3 tbsp 100% natural peanut butter (or any type of peanut butter you like!)
  • 3 tbsp icing sugar
  • 1/2 tsp brown sugar

Method:

  • Prepare the chocolate mold with the first layer of chocolate as seen in my recipe for the Buttercream Filled Chocolates.
  • For the filling, mix the peanut butter, icing sugar, and brown sugar in a bowl. Stir until the mixture forms a dough-like consistency. This filling is obviously to taste, so if you want a more “peanutty” flavour, use less sugar.
  • When the first layer of chocolate is chilled and the mold is ready to be filled, pull off small pieces of the peanut butter mixture and pat down into each cup.
  • Chill the mold for about 5 minutes.
  • To seal the chocolates, and for instructions on how to remove the chocolates from the mold, follow the same instructions as in the recipe for Buttercream Filled Chocolates.
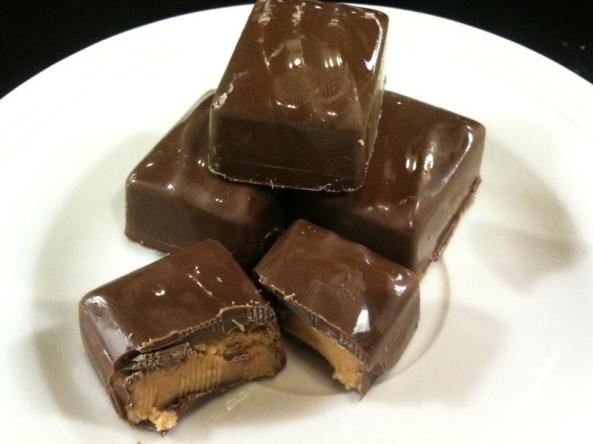
peanut butter filled chocolates

peanut butter filled chocolates