Strawberry Banana Parfait Smoothie

One of my favourite things about smoothies is that you can make them taste like dessert. Orange creamsicle smoothies, banana cream pie smoothies, pumpkin pie smoothies, and the list really can go on and on and on… They’re so versatile. As with alcoholic shots/drinks, you can also make the smoothie in layers so that it’s more pleasing to the eye… Today I decided to play around with my smoothie, and came up with a parfait smoothie! The version I made today is a bit of an “adult smoothie”, however you can omit the alcohol all together if you want to make it more kid/non-alcohol drinker friendly. The best part is how simple it is to make!

Strawberry Banana Parfait Smoothie

Bottom Layer Ingredients:

  • 1/4 cup frozen strawberries
  • 1/4 cup pomegranate juice
  • 1/2 shot of vodka
Top Layer Ingredients:
  • 1 chopped up frozen banana
  • 1/4 cup vanilla almond milk (or milk of your choice)
  • 1/2 shot Galliano Smooth Vanilla
Method:
  • Blend all bottom layer ingredients together, and pour into a tall glass.
  • Blend all top layer ingredients together, and pour on top of the bottom layer.
  • Sprinkle the top with a bit of vanilla sugar, and serve with a straw or a stick to stir it all together with!
  • Begin happy hour, and enjoy! 🙂
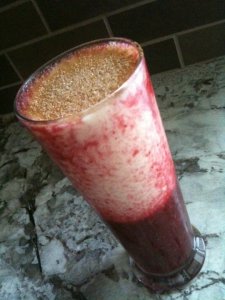
strawberry banana parfait smoothie! :)

strawberry banana parfait smoothie! 🙂

Strawberry & Date Jam

After making apple butter so many times, I decided I wanted to try some other fruit spreads. I wish I would have known how messy this jam was going to be… So be warned: this will splatter while cooking! Luckily the taste more than makes up for the mess… 😀

The dates add a thickness to the jam that makes it taste quite rich, with a sweetness that isn’t too much to handle. The lemon zest and spices add a little “something else” that you won’t find in many other jams. I love fruit spreads, and find this to be pretty unique when compared to other ones I’ve had. I enjoyed some of this jam on some whole wheat bread with goat’s milk cheese, but you could really put it on anything!

This recipe filled one 310 ml jam jar. Enjoy! 🙂

Strawberry & Date Jam

Ingredients:

  • 2 cups strawberries, cleaned with the tops cut off
  • 1/2 cup pitted honey dates, finely chopped
  • Juice and finely grated zest of 1 lemon
  • 1/8 tsp ground nutmeg
  • 1 tsp ground cinnamon
  • 2 tbsp balsamic vinegar
  • 1/4 cup sugar (you can add more if you like, but I found this to make the jam pretty sweet!)
  • 2 tbsp liquid honey

Method:

  • In a deep pot (trust me, it splashes…), place all ingredients and stir over medium heat for about 5 minutes.
  • Using an immersion blender, puree the contents of the pot, and adjust the temperature to high heat.
  • It will come to a rolling boil pretty quickly, so you need to keep stirring or the bottom will burn. If you have a heavy bottom pot, use that.
  • Continue to stir the mixture for 20-25 minutes. I don’t use a thermometer, I judge it by eye. When the mixture is thick, it’s ready to come off the stove. A good way to judge the right thickness is to pull the spoon through the middle of the mixture. Once it’s at a perfect thickness, the mixture will fall back together quite slowly. Also, when you scoop some of it up on the spoon, and tip the spoon upside down, it will “glob” off of the spoon instead of pour off nicely. For me, with the quantities of ingredients I used, it was good to remove from the heat after 25 minutes exactly. Once it’s done, remove from heat and stir a few more times until it’s cooled slightly.
  • I didn’t make a recipe for preserving, and haven’t attempted to do so yet, however if stored in a sterile glass jar (old jam jars are great), or in a clean and sterile container, you can keep this in your fridge for up to 1 week. If you like, you can also freeze this for however long you’d keep jam in the freezer, but I’ve never really been a fan of freezer jam in the past. If you do preserve jams, you can preserve this and store for as long as you normally would any other jam.
Mmmmmmm!!!!!!!! It tastes best after having sat in the fridge over night... So fruity...

Mmmmmmm!!!!!!!! It tastes best after having sat in the fridge over night... So fruity...

Strawberry Chocolate-Chip Frozen Yogurt

I feel a little strange calling this frozen yogurt, because it’s not very similar to that stuff you get at the grocery store. It’s not soft and mushy like ice cream… It’s actually closer to an Italian ice in texture, or even similar to a strawberry sorbet… Somewhat… Regardless, it’s still technically “frozen yogurt”, as there is dairy (yogurt) involved as a main ingredient. (Italian ice doesn’t have any dairy.)

This tastes pretty great, and I can imagine that in the hotter summer months ahead, it will be quite an enjoyable form of refreshment. Also, using non-fat yogurt cuts the fat almost completely! If you prefer using another liquid sweetener over honey, you can and I’m sure it will taste just as good! 🙂 Here’s the recipe, enjoy! 🙂

Strawberry Chocolate-Chip Frozen Yogurt

Ingredients:

  • 2 cups non-fat plain yogurt
  • 1-2 cups frozen strawberries (this varies depending on how much strawberry flavour you want!)
  • 2 tbsp cocoa powder
  • 2 tbsp liquid honey
  • 1 tsp vanilla extract
  • Roughly chopped dark chocolate (I used about 4 squares of a large Lindtt dark chocolate bar)

Method:

  • In a blender (or with an immersion blender), blend all ingredients except the chopped dark chocolate. Blend until smooth.
  • Stir in the chopped dark chocolate, and then pour into a couple semi-shallow plastic dishes (I used two Glad containers, about 2 inches deep)
  • Place in the freezer, and allow to harden for about 45 minutes.
  • After 45 minutes, remove the containers and stir contents until smooth.
  • Repeat this process (freezing, and removing every 45 minutes to stir) until the desired consistency is reached.
  • The frozen yogurt can be stored in these containers, or you can scoop it back into the original yogurt container. Make sure it’s covered with a lid after the whole “freeze-then-stir” process is finished.
  • Note: You can store this for many weeks in the freezer. After it’s been frozen for a day or two, it will be rock solid. Simply allow the frozen yogurt to soften slightly on the counter for 5 minutes or so prior to serving. To serve, you can also shave pieces of the frozen yogurt off of the top in layers if it doesn’t come off in one big scoop.
mmm... There it is... ;)

mmm... There it is... 😉

Strawberry Lemonade

I’m on a bit of a strawberry kick obsession it seems, but can you blame me? They’re so good! I’ve been dealing with frozen strawberries all winter, so I’m pretty anxious for strawberry season to visit us all here in Ontario.

When making things like smoothies or juice, frozen strawberries are actually a pretty good substitute. Not only are they picked and frozen at their freshest point, but they (like other frozen fruit) take the place of ice cubes without watering down your drink. That’s pretty awesome.

To get back on topic here, I usually don’t like things like lemonade to be honest. I’d much rather have a tall glass of water with a few slices of fresh lemon to provide just a hint of lemon flavour. However, there are times where I just want a glass of something sweet. I don’t like store-bought lemonade because it’s usually way too sweet, so I decided to make my own. 🙂 Here’s my recipe for some strawberry lemonade! Enjoy! 🙂

Strawberry Lemonade

Ingredients:

  • 3 big lemons
  • 1 cup frozen strawberries
  • 3 cups cold filtered water
  • sugar to taste (I only put about 4 tbsp of sugar into my lemonade because I don’t like it that sweet)

Method:

  • Roll the lemons between your hands and the counter a few times before squeezing the juice from them. (This softens the lemons a bit, allowing the juice to be squeezed out much easier. I also keep my lemons in the fridge, so if you do too, take them out of the fridge about 20 minutes prior to making this.)
  • Squeeze the juice from each lemon with a juicer (I just have a simple citrus-juicer, and it works great!), and pour the lemon juice into a juice jug.
  • Add all other ingredients into the jug, and with an immersion blender simply blend everything together until smooth. (If you just have a regular blender, you can use that too!)
  • Pour into a glass, and enjoy!
  • Note 1: You may need to shake/stir the juice a bit before serving as juice tends to settle when sitting for a while. Not that it will be an issue, 😉 but try to consume within a few days of making the juice.
  • Note 2: Try it with other frozen fruit! Melon, blueberries, raspberries, banana… And for something really interesting, toss in a few cinnamon sticks and a few drops of vanilla extract. There are so many options! 🙂
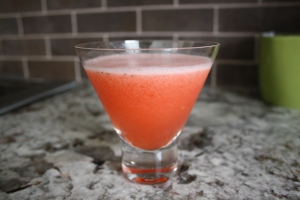
Refreshing... :)

Refreshing... 🙂

Rich & Raw Vegan Chocolate Cake

There seems to be a stigma attached to vegan desserts. A lot of people think they don’t taste like normal desserts, or that it’s impossible for them to even compare. In some cases, this may be true… But the people who think this must NOT have ever had a vegan dessert, because let me tell you, they really can taste amazing! {A vegan chocolate pudding I made a while back tasted so good!} Last night I wanted some chocolate cake, but nothing too sweet or fattening. I really didn’t feel like loading up on flour, eggs and butter. So I brought some items out of the cupboards, and got started on a chocolate cake, vegan style! For those of you that are raw foodists, you’ll be happy to know that you can make this too! Everything is “raw” in this dessert, although some argue that cocoa powder isn’t “raw” because the beans are actually roasted before being made into powder. You can easily use raw cocoa if you like, or even carob powder. Also, this dessert has no sugar added to it, but it’s still sweet! Anyways, I’ll stop talking about this and get to the recipe already! This is a very rich “cake”, and can be cut into 4 servings. This cake EASILY passed the husband-taste-test, and he ate half of the cake… So if you’re anything like him, this cake makes 2 servings… 😉 I’ve also included a ganache recipe that worked really well for this.

Rich & Raw Vegan Chocolate Cake

Layer 1 Ingredients:

  • 1/2 banana, mashed
  • 1/2 cup ground almonds
  • 1/4 cup cocoa powder
  • 1/4 cup walnut pieces, finely chopped

Middle Layer Ingredients:

  • About 8 dates, soaked for about 20 minutes so that they’re nice and soft
  • 1-2 tbsp strawberry preserve OR strawberry puree {you can use any berry you like for this part}
  • 1/4 cup dried cranberries

Layer 2 Ingredients:

  • 1/2 banana, mashed
  • 1/2 cup ground almonds
  • 1/4 cup cocoa powder
  • 1/4 cup sliced almonds, finely chopped

Method:

  • In a small bowl, allow the dates to soak while you make layer 1 of this cake.
  • Line a small/medium dish/cake pan with foil/parchment paper/plastic wrap, and set aside. {This cake isn’t too big, so I used a french onion soup bowl to form the cake. It’s about 4.5 inches in diameter, and only about 2 inches deep.}
  • Layer 1: In a bowl, mix together the mashed 1/2 banana, ground almonds, cocoa powder and 1/4 cup chopped walnut pieces until combined. Press the “dough” into the bottom of the lined dish/cake pan. Place the dish in the freezer while you prepare the middle layer.
  • Middle layer: Drain the liquid from the dates, and add the preserve. Mix until well combined. Remove the cake dish from the freezer, and spread the date and preserve mixture over the “dough”. Sprinkle the dried cranberries over it all. Return to the freezer for 10 minutes.
  • Layer 2: Make layer 2 the same way you made layer 1. After 10 minutes, remove the cake from the freezer and place this dough on top. You may need to make a ball with the dough, and flatten it into a disc before putting it onto the cake. Press the dough down lightly so that it’s flat on the top. Place the cake back in the freezer for another 10 minutes.

Ganache

Ingredients:

  • 4 squares best quality dark chocolate {aim for as high a cocoa % as you can enjoy. For vegans, you can use any vegan chocolate.}
  • About 1/4 cup vanilla almond milk

Method:

  • Place the chocolate and almond milk into a bowl/cup, and microwave on high for about 20 seconds.
  • Remove from the microwave, and stir until smooth and creamy. It may not look like it will come together at first, but just keep stirring! If you want a thicker ganache, just add another square of chocolate while the liquid is hot, and stir until smooth.

To Serve The Cake:

  • Remove the cake from the freezer.
  • Hold a plate over the top of the dish, and then while holding the plate firmly to the cake dish, flip it upside down and rest the plate on the counter.
  • Slowly and carefully, remove the cake dish from the plate. While doing this, hold the sides of the foil/plastic wrap to the plate so that the cake comes out of the cake dish. Set the cake dish aside.
  • Slowly peel the foil/plastic wrap off of the cake.
  • Cut the cake into 2 or 4 pieces {depending on how many people you are serving}, and place each slice on a plate.
  • Drizzle with ganache, and enjoy! 🙂
Vegan Chocolate Cake a la Nikki ;)

Vegan Chocolate Cake a la Nikki 😉

Strawberries Anyone? Looking Forward: Strawberry Social

 EDIT: REVIEW OF THIS YEAR’S STRAWBERRY SOCIAL

I love strawberries, and I love the St.Lawrence Market. So…

On the agenda for next weekend? Strawberry Social at the St.Lawrence Market!!! 

It’s strawberry season at St. Lawrence Market! 

Sample complimentary strawberries dipped in mouth-watering chocolate at the peak of strawberry season. 

Join us in the North and South Markets for a berry good time! 

Saturday, June 19, 2010 9:00 a.m.1:00 p.m. 


Who DOESN'T love strawberries? Really! They are full of awesome. {These are some juicy Ontario strawberries...}

Who DOESN'T love strawberries? Really! They are full of awesome. {These are some juicy Ontario strawberries...}

Honey & Vanilla Pancakes {with Strawberry & Rhubarb Sauce}

One of the things that I love to do on Saturdays now that the weather is nicer, is go downtown to the St.Lawrence Market. I love wandering through the North Farmer’s Market tables, because most of what you get there is local produce, with a lot of organic options. Inside the two levels of the South Market, you will find everything food related from cooking supplies, produce, cheese, meats and more! On Saturdays, they’re open at 5am, so I make my way down there as early as possible. Today, I managed to get there for shortly before 6am, and went on my mission to pick up some tasty foods. Since I was out grocery shopping at the market so early, getting back from the market at 7am gave me ample time to prepare a tasty and healthy{ish} breakfast for Joe and myself. {More about my day at the St.Lawrence Market.}

This morning, I decided on pancakes. I don’t really like plain pancakes, and didn’t feel up for adding fruit to them. I loved chocolate chip pancakes as a kid, but find that to be a bit too sweet for such an early hour. What I wanted was something that was light, with a hint of sweetness to them. So here’s what I threw together! Enjoy! 🙂

This recipe serves 2 people, and I’ve also included a quick strawberry rhubarb sauce that I made to go along with the pancakes.

Honey & Vanilla Pancakes

Ingredients:

  • 1 1/2 cup unbleached flour
  • 2 tsp baking powder
  • 1 tbsp vanilla
  • 1 tsp cinnamon
  • 1 3/4 cups milk {start with 1 1/2 cups, if the batter is too thick, add a little more in 1/4 cup increments until it’s as thin or thick as  you like it}
  • 1/2 tsp salt
  • 2 egg whites
  • 2 tbsp vegetable oil
  • 1 tbsp golden liquid honey
  • 1 tsp vanilla sugar

Method:

  • In a large bowl, mix together all of the dry ingredients.
  • Add the egg whites and oil to the dry ingredients, and stir.
  • Add all of the other ingredients, and mix well until there are no lumps/traces of dry ingredients.
  • Heat a pan over medium heat, and spray with a light coating of cooking spray. Allow to warm up for a minute or two.
  • Pour about 1/4 cup of pancake batter {more if you want larger pancakes, less if you want smaller pancakes}, and tilt the pan slightly to make sure the batter is spread out evenly. You don’t want it too thinned out, and may not even need to tilt the pan at all…
  • Allow to cook until you see bubbles forming on the surface of the batter. At this point, use a spatula to slowly and carefully detach the pancake from the pan. Once you’ve gotten the pancake onto the spatula, carefully flip it uncooked side down back into the pan. If you’ve never made pancakes before, your first or second one may be a little crumbled and ugly, but that’s alright! 😉 Start off with small pancakes, it’s easier.
  • Once it’s flipped onto the other side, cook for another 2-3 minutes. After 2 minutes, check the pancake by gently lifting the side up with the spatula. If it’s golden brown, it’s good to go! If not, keep it on longer, checking at 1 minute intervals.
  • When it’s done, set the pancake aside in a paper towel lined plate {if you just stack them on a plate while they’re sitting waiting for the others to be done, the steam coming from the pancake will collect onto the plate and cause your pancakes to be soggy}. Then cover the plate of pancakes with a plate or a bowl so they stay warm. Repeat these steps with a 1/4 cup of batter for each pancake until all of the batter is done.
  • Serve with syrup, a fruit sauce, or any other toppings you like! 🙂

Strawberry & Rhubarb Sauce

Ingredients:

  • 1/2 cup chopped strawberries {about 5 large, or 10 small}
  • 2 stalks rhubarb, finely diced {prepare the stalks of rhubarb similar to the way you would prepare celery. Cut off both ends, cut out any dented or marked bits, and if you like you can peel off some of the outer skin although it is not necessary}
  • 1 cup water
  • 1/2 cup orange juice
  • 1 tsp sugar
  • 1 tsp cinnamon
  • 1 tsp vanilla extract
  • 1 tbsp maple syrup

Method:

  • Fill a saucepan with 1 cup of water, and the rhubarb, and bring to a boil over medium-high heat.
  • Allow to boil for 1 minute, then drain.
  • Add the orange juice to the saucepan with the rhubarb, and all of the other ingredients except for the strawberries and maple syrup.
  • Return the saucepan to the stove, and bring back to a boil at medium-high heat.
  • Once it comes to a boil, cook {stirring constantly} for 1 minute.
  • Remove from heat, and add the strawberries and maple syrup. Stir.
  • Add all contents to the blender, and blend until smooth.
  • Drizzle the sauce over pancakes, waffles, or frozen yogurt/ice cream!
Honey & Vanilla Pancakes With Maple Syrup, Rhubarb & Strawberry Sauce, and a Sliced Strawberry :)

Honey & Vanilla Pancakes With Maple Syrup, Rhubarb & Strawberry Sauce, and a Sliced Strawberry 🙂

Starbucks “However-You-Want-It” Frappuccino – Review

Oh Starbucks, I could write a poem to express my love for thee…

Cups of white with circle green,

Filled with the brewed coffee bean.

Frothy milk,

Oh,

Creamy topping.

A double-shot?

My heart is stopping.

Drizzle to your heart’s content,

To buy your brew,

I’ll forgo my rent.

Beautiful, isn’t it? I’ve always felt that I was the reincarnation of some great poet… *sigh* The emotional connection that I have to Starbucks really DOES bring out the poet in me… Brings a tear to my eye almost… Okay, maybe not.

As much as I constantly mock their higher-than-necessary prices for their tasty beverages, I’ve got to say that the Starbucks company is brilliant. Creating beverages that faithful customers literally crave {and need}, and putting them at a price that definitely causes your wallet to lose a pound or two {hah, I know there’s an opportunity for a pun or joke in there somewhere… I’ll leave it be…} is genius. Of course there are some of us out there that love to mimic the drinks at home, and with some success needless to say! But nothing beats going on a walk through the city on a nice hot day {or cold day}, and popping into the eclectic coffeehouse to purchase an ice-cold {or steaming hot} treat.

Fact about my life: Joe {who’s now my husband} and I had our first date at a Starbucks. What a shocker, eh? 😉

All over the place, I see signs and ads for the “however-you-want-it frappuccino”. I’ve tried this a few different times already… The first time, I ordered a “tall non-fat java chip frappuccino with 1 pump of peppermint syrup and 1 shot of espresso”. Wow, that’s a lot to say for just one drink… Anyways, I walked out of there with a “tall light caramel frappuccino”. Still not quite sure how that happened… Either way, it tasted great anyways!

The second time, I ordered the same drink as the first time, and got it. The taste? Meh, I’ve had better… {Maybe the wrong drink order the first time was the barista’s way of telling me “your drink choice sucks, try this, it’s better.”}

So the third time, I was a little worried. Maybe Starbucks is giving us too much choice! I decided I was going to try something completely different from my first two. I don’t like soy milk, so this whole “strawberry soy” thing that everyone is mentioning just made me sad. But wait, what’s that? I can change whatever I want in the drink? I can order any type of milk I like? Perfect! I ordered a “tall non-fat milk strawberry frappuccino with whipped cream”, and oh boy was I ever happy I did! This is probably my favourite frappuccino from Starbucks yet! With the exception of a drink they had years ago when I was in highschool… This drink was called the “tazzo berry frappuccino blended cream”, and it tasted like a piece of heaven with a glob of tazzo-berry juice. Don’t ask me what “tazzo-berry juice” is, because I don’t know. But what I do know is that it tasted better than anything that Starbucks has ever made… This strawberry frappuccino comes in at a close second in the cold-beverage category for me!

I must add, that the “low calorie” frappuccinos are also worth trying! The “Mocha Light Frappuccino” really tickled my taste buds, and didn’t taste low calorie at all! For a tall, it’s only 100 calories! You can’t go wrong with that… 😉

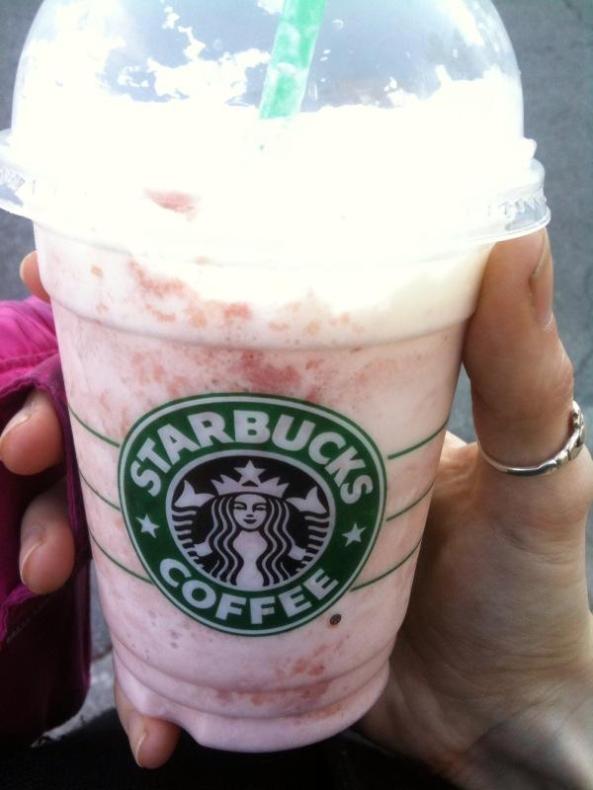
I’ll stop rambling now. Go, to Starbucks, and order one of these! “Tall non-fat milk strawberry frappuccino with whipped cream”. Go, do it! Here’s a picture of it before I quickly inhaled it.

The definition of Joy.

The definition of Joy.

House Cake Project: Stage 6 – Birthday Cake For Joe

For this installment of my House Cake Project, I decided to take a break from the rolled fondant. I have found a brand that I really like, however I wanted to try something new. {Well, “new” for me is “not working with fondant”…}

There aren’t any special recipes for this cake, instead I’ve put together a layer cake. I asked Joe what his favourite types of cake are. His reply was “rainbow bit, and cheese cake!”, so I had to find a way to blend the two… And wow, was this ever a tasty combination…

I decided on making 2 “rainbow bit cakes” {box mix}. Then, in between the top and bottom layers of rainbow bit cake, I placed some frosting, sliced strawberries, and a cheese cake. The cheesecake was a basic cheese cake recipe {vanilla/plain} with strawberry preserves swirled throughout the top of the cheese cake prior to baking.

The layers, from bottom to top, are:

  1. rainbow bit sponge
  2. vanilla cream cheese frosting
  3. sliced strawberries
  4. cheesecake {no crust} with strawberry preserve swirl
  5. vanilla cream cheese frosting
  6. sliced strawberries
  7. rainbow bit sponge
  8. strawberry preserve glaze on top of cake {For the glaze, simply ice the sides of the cake, and leave the top un-iced. Then, microwave the strawberry preserve/jam in a bowl for about 45 seconds, stirring every 15 seconds. Allow to cool slightly, then spread over the top of the iced cake.}

The cake was then iced with the same vanilla frosting. I toasted some sliced almonds with a sprinkle of cinnamon for about 5 minutes in the oven, and tossed them along the side of the cake. I also prepared some double chocolate dipped strawberries for garnish {dipped the strawberries in melted milk chocolate, then drizzled some melted white chocolate over the berries once the milk chocolate was set}, and made a chocolate plaque for the top of the cake. {The plaque was just some melted chocolate, poured and shaped with a spatula onto some parchment paper, then writing was piped on with a piping gel and allowed to set in the fridge before application to the cake.}

Everyone seemed to really enjoy this, as there was no cake left over afterwards! The cake turned out significantly larger than I had hoped, but that’s okay… 😉

Here’s the visuals!

Finished product!!

Finished product!!

Just because it’s pretty, here’s a picture of a double chocolate dipped strawberry! 🙂

Smoothie Week – Some Smoothie Recipes

For health reasons, this week I’m unable to eat solid foods. This is a bit of a problem because, well… I love to eat. Especially crunchy or spicy foods…

So this week, a liquid diet is on the menu. I didn’t want to go a week without posting recipes, so I figured I’d write out some smoothie mixtures that will satisfy my tastes along with providing some protein and other nutrients that I need. Each smoothie can have the addition of something such as protein, fiber or ground flaxseed, it just depends on what is lacking and still necessary for that day. Supplements can even be omitted entirely if not needed. If you drink regular milk, you can also use this in place of the almond milk that I’ve written in each recipe.

I get bored of adding just orange juice or apple juice to my smoothies. One brand of fruit juice that I really love to use with these smoothies is the “Sun-Rype Fruit Plus Veggies”. They have a large assortment of flavours, and each juice can add a different taste to your smoothies.

Rather than write up a bunch of individual posts, I’ll keep all of the smoothies to this one post. (However, I will list them separately on the Recipe Index.)

Each smoothie recipe makes 1 medium – large smoothie. The method for each smoothie is to simply toss all ingredients into a blender, and blend until smooth! Enjoy! 🙂

Here’s a nice coffee and chocolate smoothie that I love to have when I’m starting my day:

Café Mocha Smoothie

Ingredients:

  • 1/2 cup chilled coffee
  • 1/2 cup vanilla almond milk
  • 1/2 cup crushed ice
  • 1-2 tbsp protein powder, or 1 tsp Benefiber (or any other supplement you may want to use)
  • 1 tbsp cocoa powder
  • 1/4 cup vanilla frozen yogurt

This smoothie is probably one of my favourites, because it tastes like a peanut butter cup. It definitely satisfies that sweet tooth, while being considerably more healthy:

Peanut Butter Cup Smoothie

Ingredients:

  • 1-2 tbsp protein powder, or 1 tsp Benefiber (or any other supplement you may want to use)
  • 1 tbsp smooth 100% natural peanut butter
  • 1 tbsp cocoa powder
  • 1/4 cup crushed ice
  • 1/2 cup vanilla frozen yogurt
  • 1/2 – 3/4 cup vanilla almond milk
  • Optional: 1 tbsp chocolate chips

This smoothie is nice and light, and the melon really helps to make the pineapple less tangy:

Melon Pineapple Smoothie

Ingredients:

  • 1/2 cup frozen melon of your choice
  • 1/2 cup frozen pineapple
  • 1/2 cup vanilla frozen yogurt
  • 1 cup orange juice
  • 1/4 cup vanilla almond milk
  • 1-2 tbsp protein powder, or 1 tsp Benefiber (or any other supplement you may want to use)

This one is almost like a creamsicle 🙂 :

Orange Banana Cream Smoothie

Ingredients:

  • 1-2 tbsp protein powder, or 1 tsp Benefiber (or any other supplement you may want to use)
  • 1/2 cup orange juice
  • 1/2 tsp vanilla extract
  • 1 banana
  • 1/2 cup vanilla almond milk
  • 1/2 cup vanilla fat-free yogurt or vanilla frozen yogurt

I like to consider this one a dessert… It tastes just like a chocolate covered strawberry:

Chocolate Covered Strawberry Smoothie

Ingredients:

  • 1-2 tbsp protein powder, or 1 tsp Benefiber (or any other supplement you may want to use)
  • 1 tbsp cocoa powder
  • 1 tbsp chocolate chips
  • 3/4 cup orange juice
  • 1/2 cup frozen strawberries
  • 1/4 cup vanilla almond milk

This one has a surprisingly pleasant flavour. Dates are really sweet, and have such a nice after taste. You may need to add a little bit more almond milk if the smoothie is too thick though:

Vanilla Date Smoothie

Ingredients:

  • 1/4 cup pitted and chopped dates (I like Medjool dates best)
  • 3/4 cup vanilla almond milk
  • 1/2 cup vanilla fat-free yogurt
  • 1/4 tsp vanilla extract
  • 1-2 tbsp protein powder, or 1 tsp Benefiber (or any other supplement you may want to use)
  • optional: 1 banana

This one is pretty tangy, and has such a fresh taste:

Tropical Smoothie

Ingredients:

  • 1/2 cup pineapple
  • 1/4 cup orange juice
  • 1/4 cup pineapple juice or apple juice
  • 1/2 cup strawberries
  • 1 banana
  • 1/2 cup orange sherbert
  • 1-2 tbsp protein powder, or 1 tsp Benefiber (or any other supplement you may want to use)

Similar to the chocolate dipped strawberry smoothie, I consider this one a dessert. It’s so creamy and rich:

Chocolate Covered Banana Smoothie

Ingredients:

  • 1 tbsp cocoa powder
  • 1 banana
  • 1/4 vanilla frozen yogurt
  • 1/2 cup vanilla almond milk
  • 1-2 tbsp protein powder, or 1 tsp Benefiber (or any other supplement you may want to use)

**********

I was going to include 3 “green smoothie” recipes below… However, after attempting to drink the “lettuce berry” flavour, I’ve decided that I don’t really like the taste of greens in my fruit smoothies. If you would like to try them, do so at your own risk… 😉 I’ll keep them posted below, but they are crossed out. If you try them, and don’t like them, remember: you were warned! 😉

Continue reading